Resizing partition in windows is not always easy or free. By default you can use native disk manager utility in Windows operating system to perform disk operations. If you have free diskspace and you want to extend disk size. Its a very simple scenario. Dealing with such simple case, you don’t need any third part tool. You can use native disk manager to extend logical volume size.
However there are few advanced options which are not available in windows disk manager. One example is reduce one drive and allocate its space to another drive. To perform such operations one needs third party tools. We are going to use same
In this case we are using Microsoft Window 10 along with Paragon partition manager. Windows have only 1 disk with 30 GB capacity. We will try different options here. Some of these options are available in native windows disk manager tool, however advance options are not available.
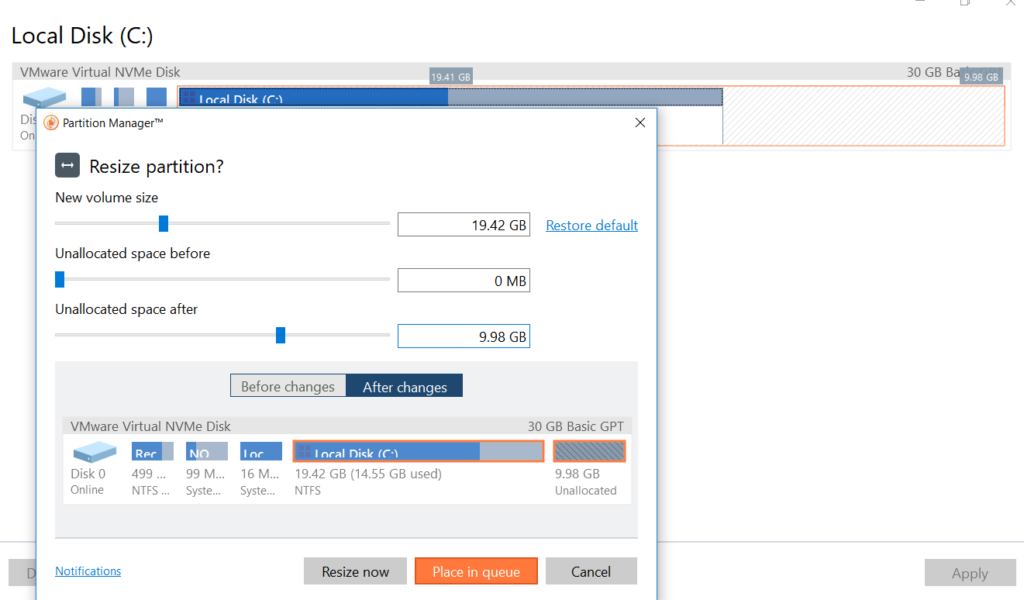
In our example we have a machine with 30 GB disk all as a one single partition C drive. We will be reducing the size of C drive to 20 GB and make another Drive D 10 GB. This is how disk looks like initially. Then we will understand how one can change the sizes of C and D dive further with a mouse drag and a couple of clicks. So first thing first, blow image shows the current structure of disk.

We will select the disk, move the mouse to the end. Click there and drag it towards left from the end as you can see in the blow image.

You can see in the below image that new size of C will be 19.42 GB and 9.8GB will be unpartitioned. Click on resize now.
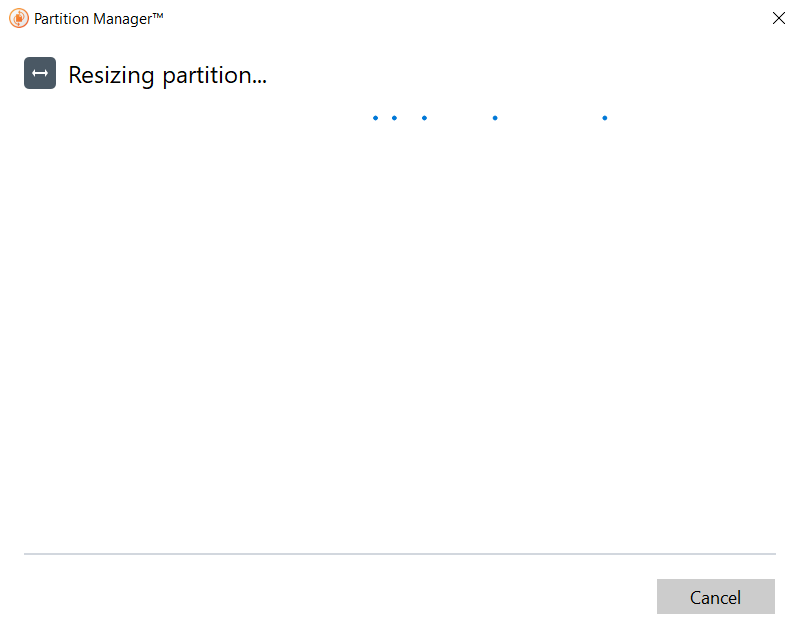
Now it will start resizing the disk and you will find message like this. Be patient for a few minutes.
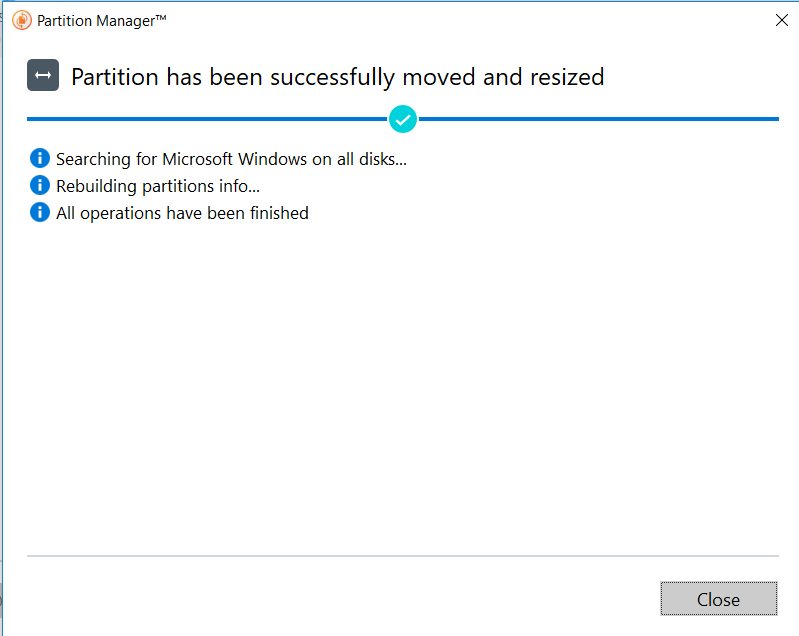
After a while you will get a message that partition has been successfully moved and your disk will be resized.
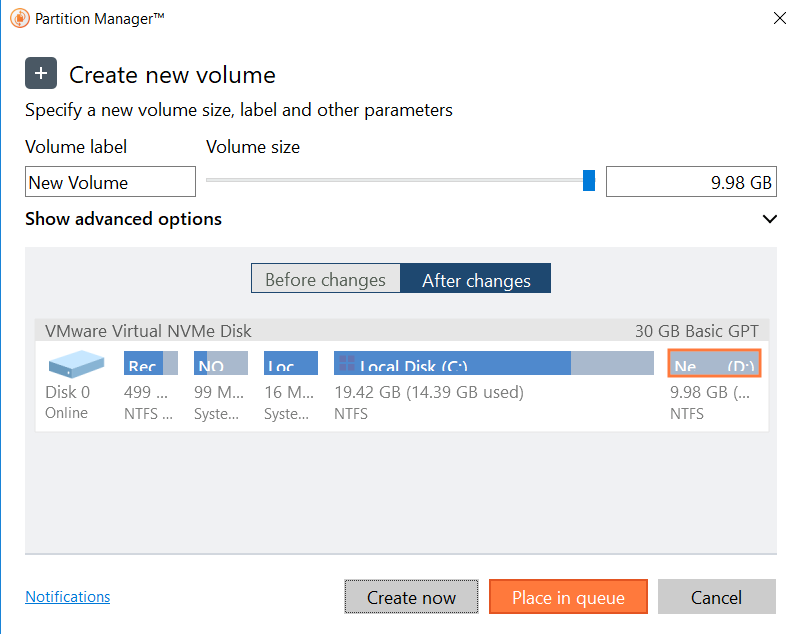
Now you can click on the unpartitioned disk and select the “Create volume” options from the left menu.

Now software will inform you that its going to create a new partition D drive with 10GB size. Click on create now.
Once again, you have to wait for a minute and there you go. You will get a message of successful operation.
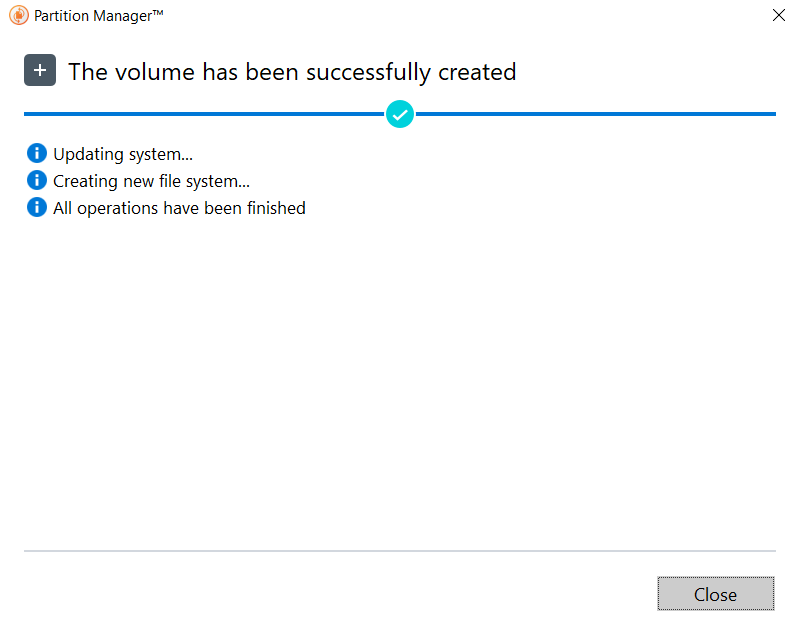
Now you can see in Windows explorer that you have a C drive with approximately 20 GB disk size and a new D drive 10 GB.

Same way if you want to change the size again. You can click in between the C and D drive and move it on the right hand side to increase C dive (to maybe 25) and reduce the size of D drive (to maybe 5 GB).

Similarly you can drag it to left to reduce the C drive (maybe 15 GB) and increase the D drive (maybe 15 GB).

I hope you understand the process now. There are dozen of other software available in the market. More of less all software provide similar features. You can select anyone of them depending on your requirements. Best option is to go through vendor website and use trial version. Also please remember followings.
- Some third party software are not free. You need to pay for it.
- Some software are limited to specific operating system versions only.
- For some software workstations operating systems are free, but you might need to pay for server operating system.
-

How to install Windows 10
In order to install windows 10 boot your PC/laptop/VM from Windows 10 iso media. Best place to download the media…
-

Extend Logical Volume in Windows 10/11 or Server
Users and administrators often face diskspace shortage issues. Lets learn how to extend logical volume and fix it.


Leave a Reply