In order to install windows 10 boot your PC/laptop/VM from Windows 10 iso media. Best place to download the media is Microsoft official site (http://www.microsoft.com/en-us/software-download/windows10). We are using same official media in our example on a VMWare environment. Your installation wizard might be slightly different based upon your operating system version and variant. However the main process remains same. Following is the step-by-step guide that will take you from zero until your desktop loads. The article mainly contains two parts.
- Boot from media.
- Install Windows 10 operating system.
- One-time configuration.
Boot from media
Your need to bun this bootable ISO on DVD/USB etc. After that insert the bootable DVD/USB/ISO and power on your computer. Once you boot from media it will ask you to press any key.

Install Windows 10 Operating System
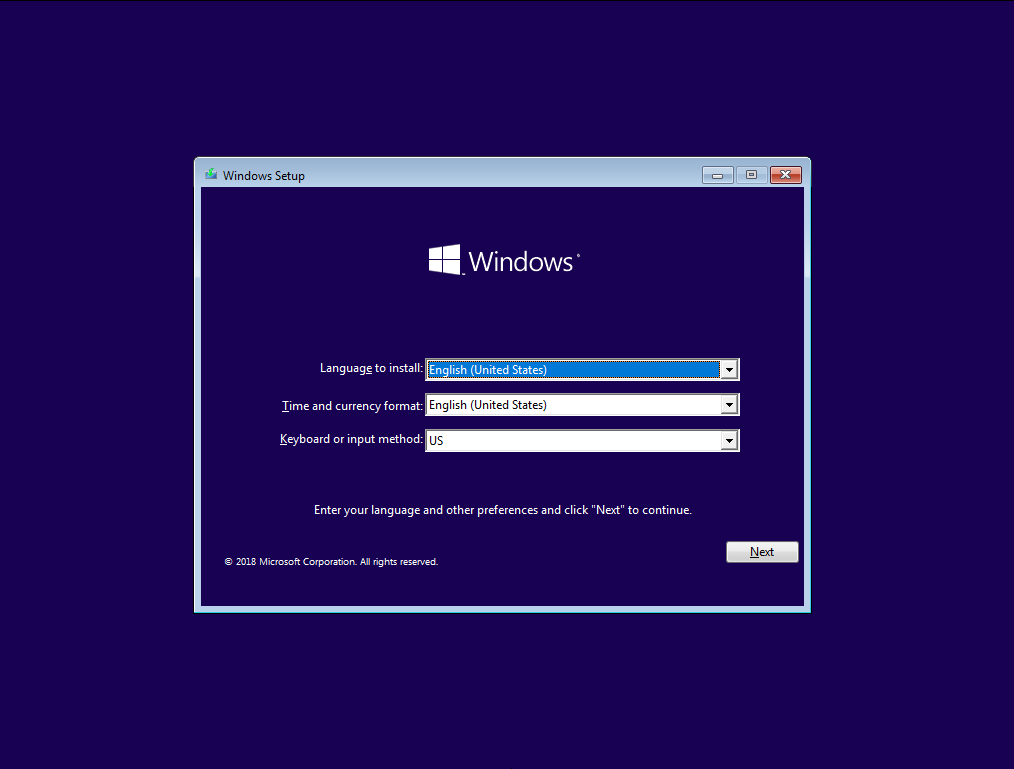
Firstly you need to select language, time and keyboard type. Secondly click next.
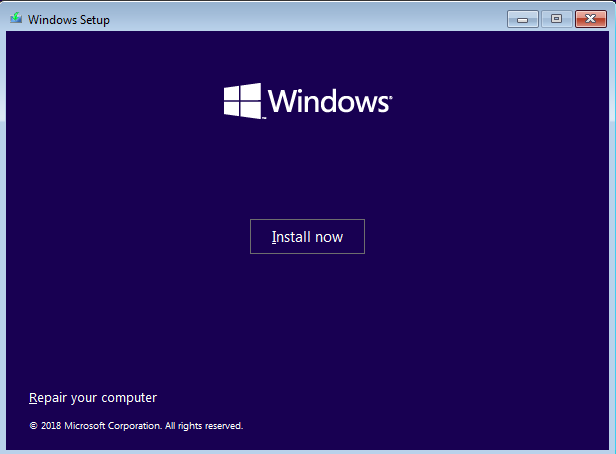
You will find a button install now. Click it.
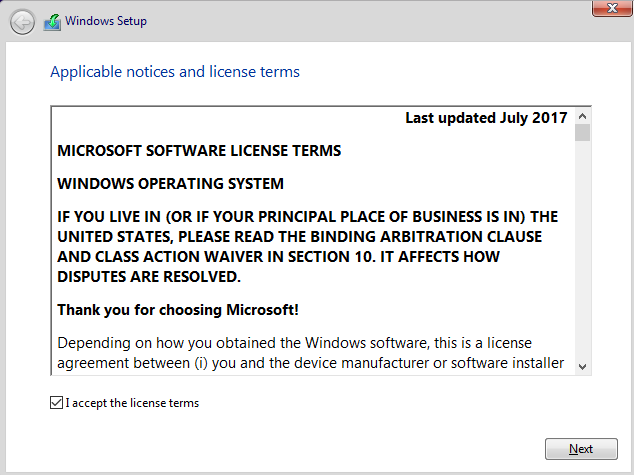
Now check “I accept the license terms”. Then click on next button.
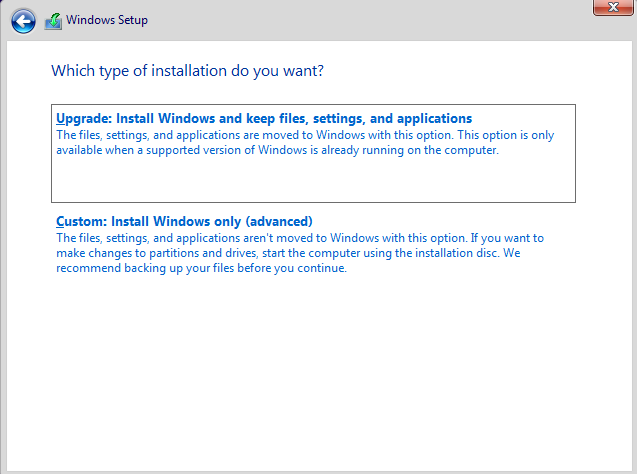
Click on Custom: Install Windows only (advanced).
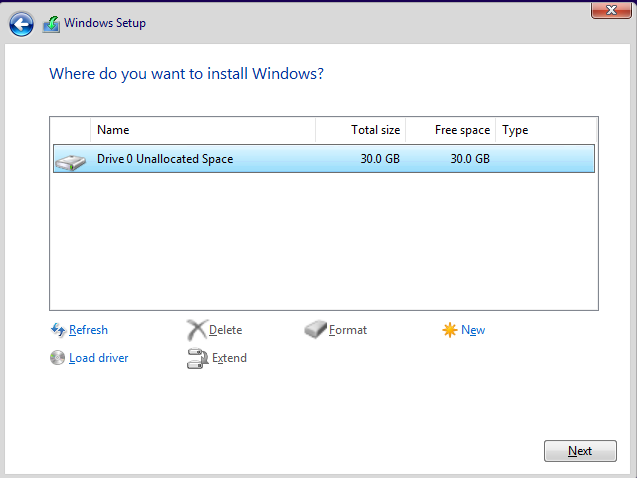
You will find the disk installed on your computer. Here you need to select the disk then click on new.
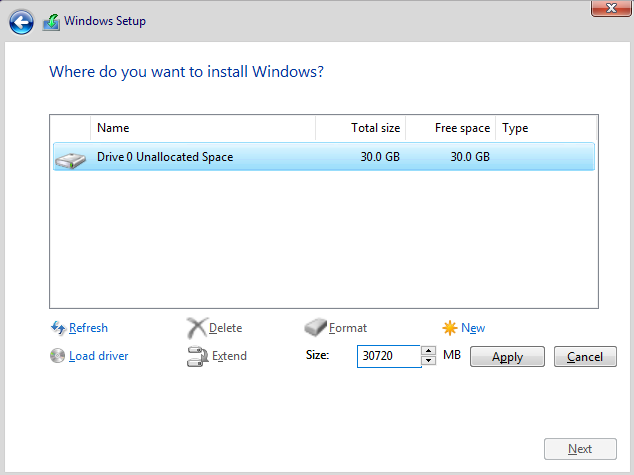
After selecting disk, click on apply to use all disk as C drive. (in our case its 30 GB). You can use consider using lower disk space if you disk is big in size. Later you can create more partitions using free space (D, E drive etc)
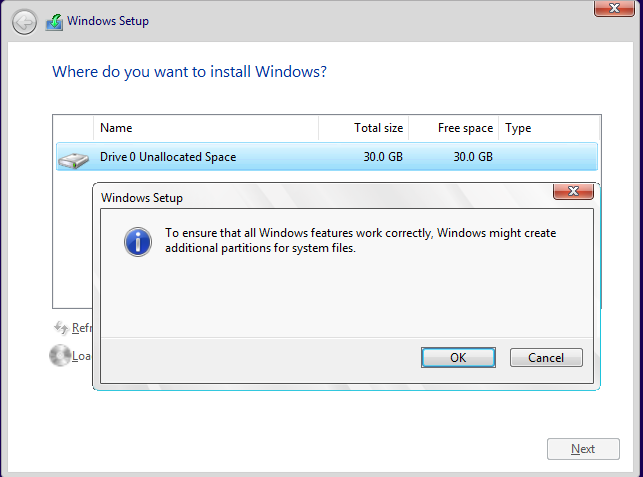
You will find a message that windows will create additional/system partitions. For system usage this is created by windows. Click OK.
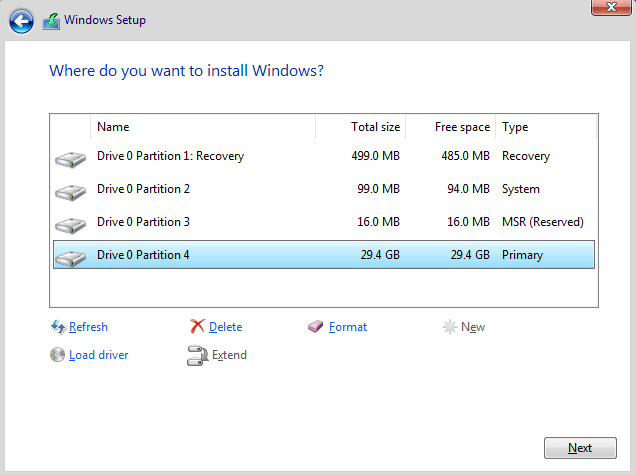
As you can see, the system has created few partitions marked as recovery, system and MSR(reserved) and one primary partition. However primary partition (in our scenario drive 0 partition 4) is the biggest one and it will be used for operating system. Select it and hit next.
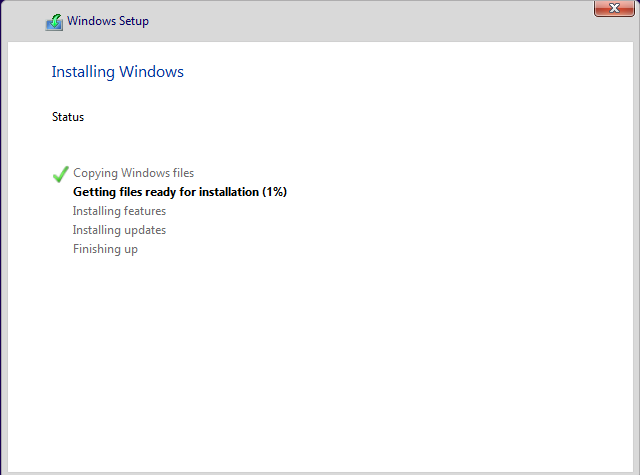
Your installation process starts now. Wait for a few minutes.
One-time configuration for Windows 10
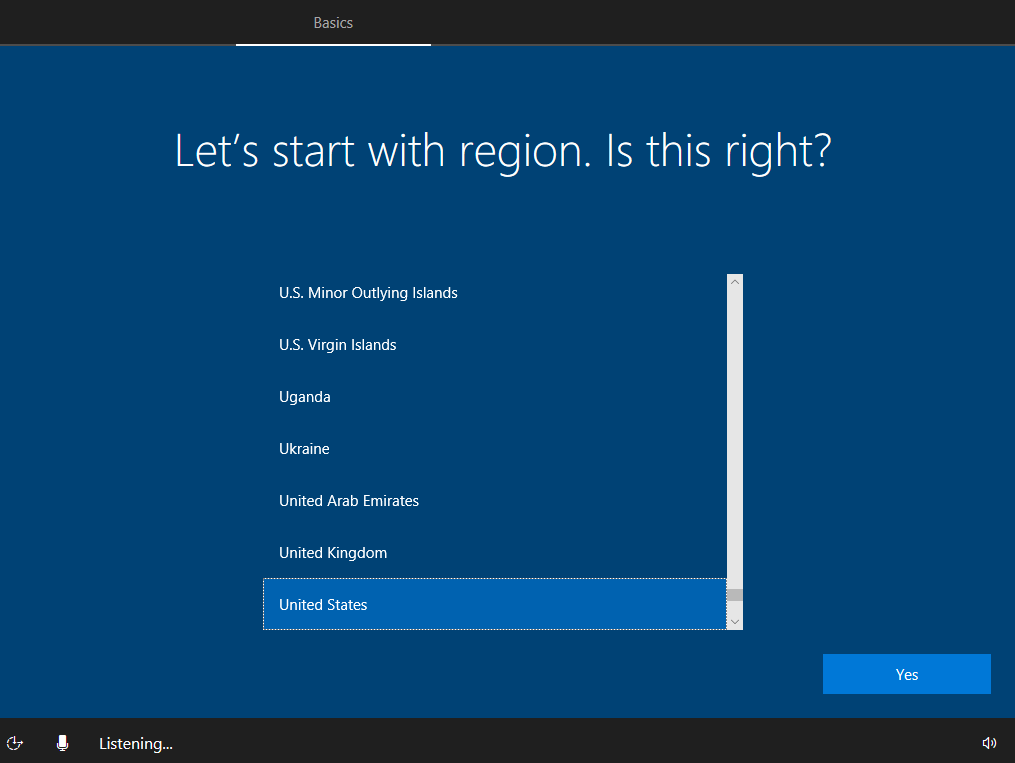
From list of countries. Next select the region you are in and click yes.
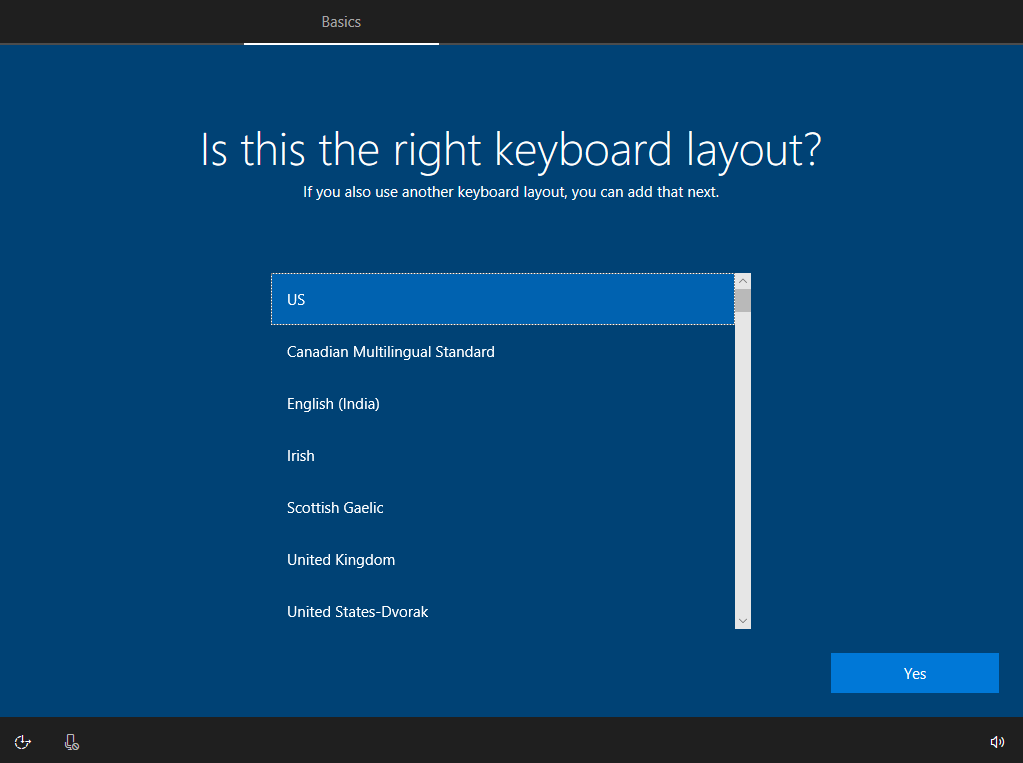
Choose a keyboard type and click yes.
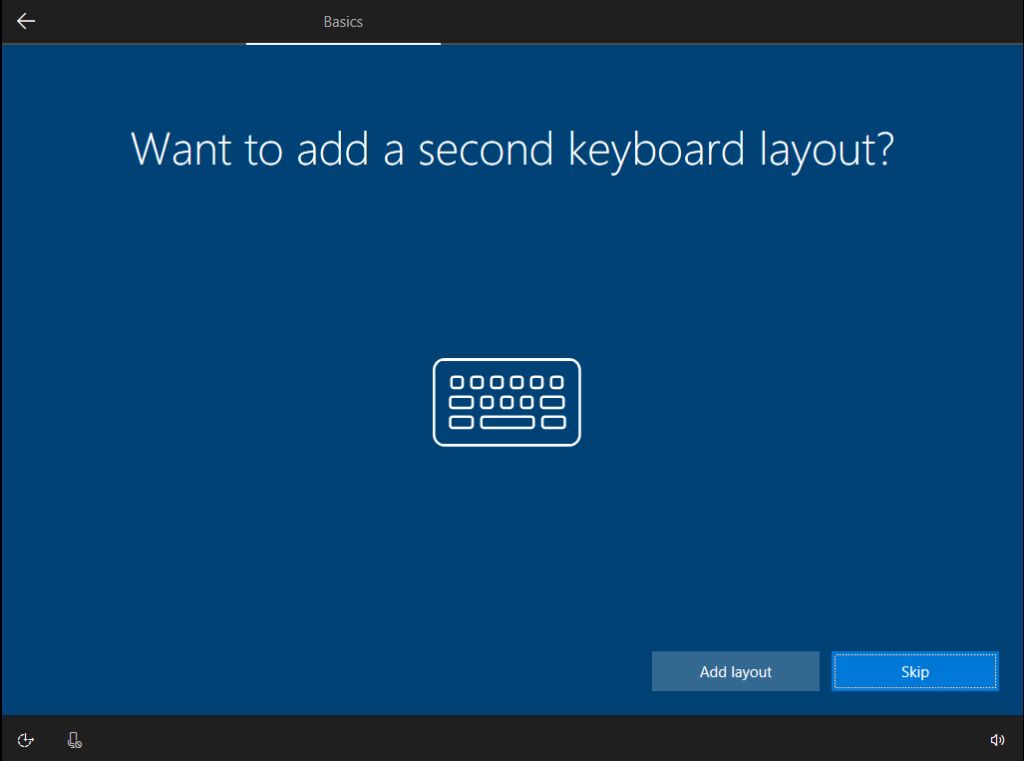
Skip the second keyboard layout (if not needed).
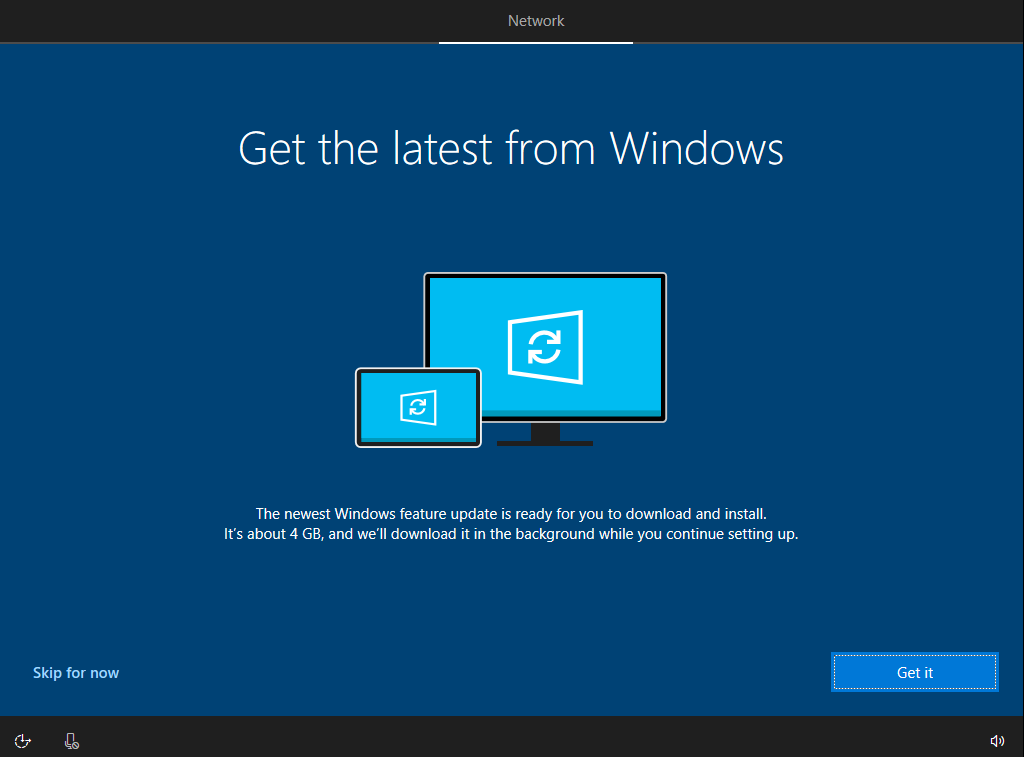
Your system will prompt you to update. You can click “Skip for now”. Don’t worry this can be updated later.
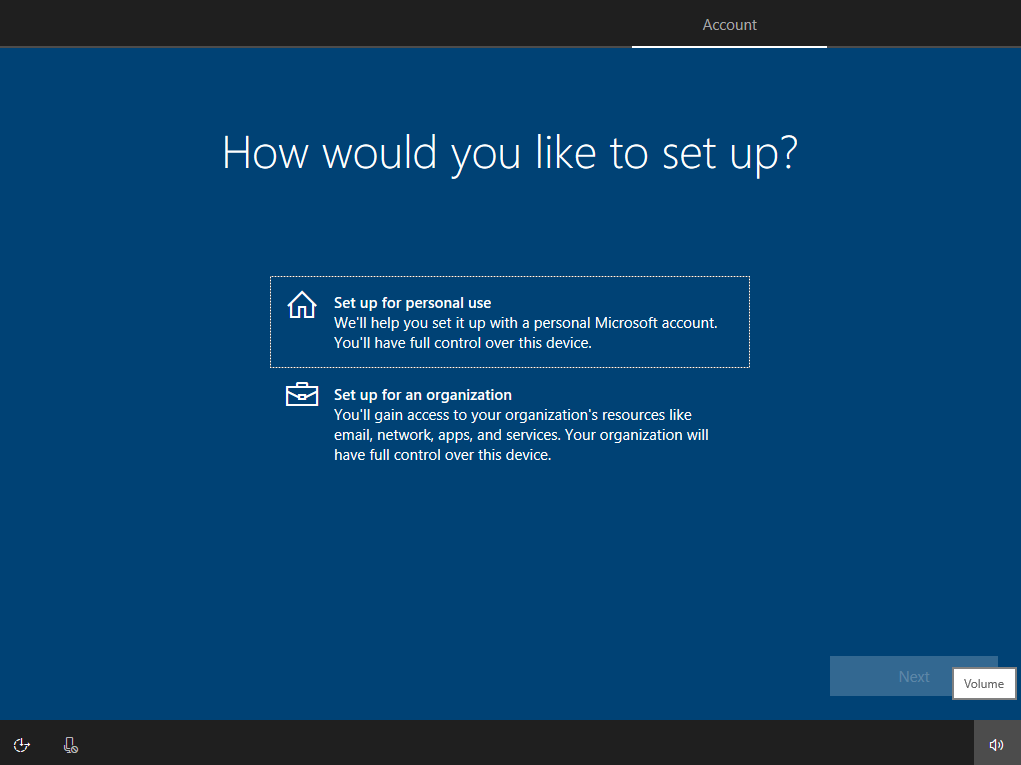
I you are using it for personal use. Use first option and click next. I using for office use second option.
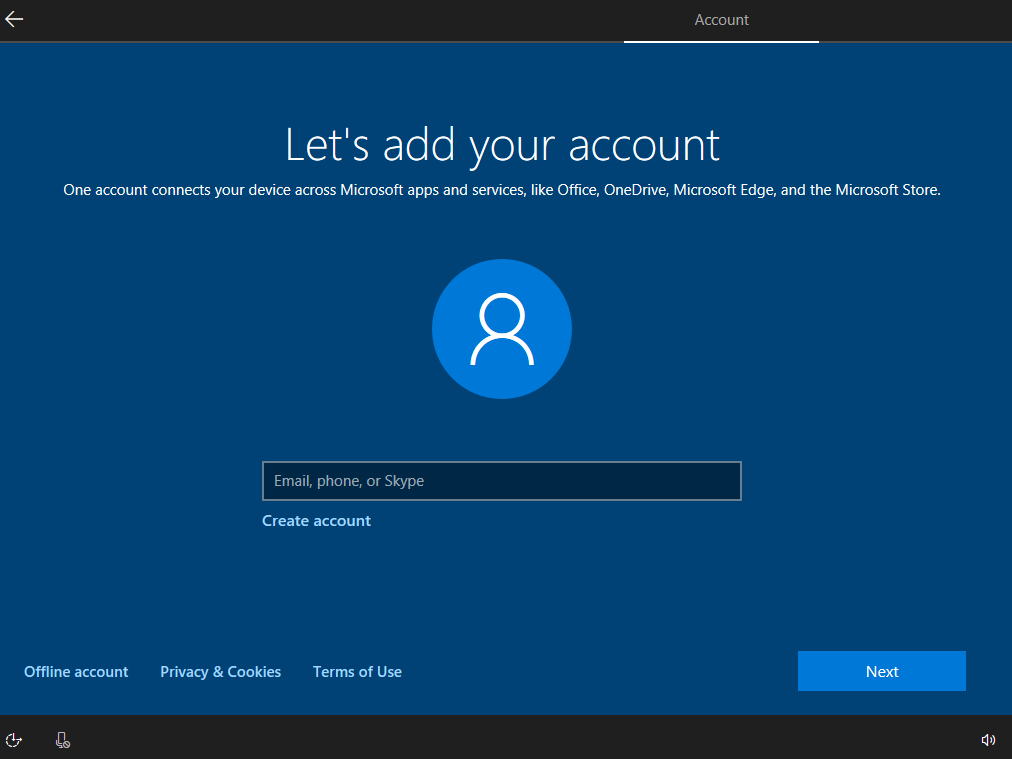
It will ask you to create a account. You can select offline account.
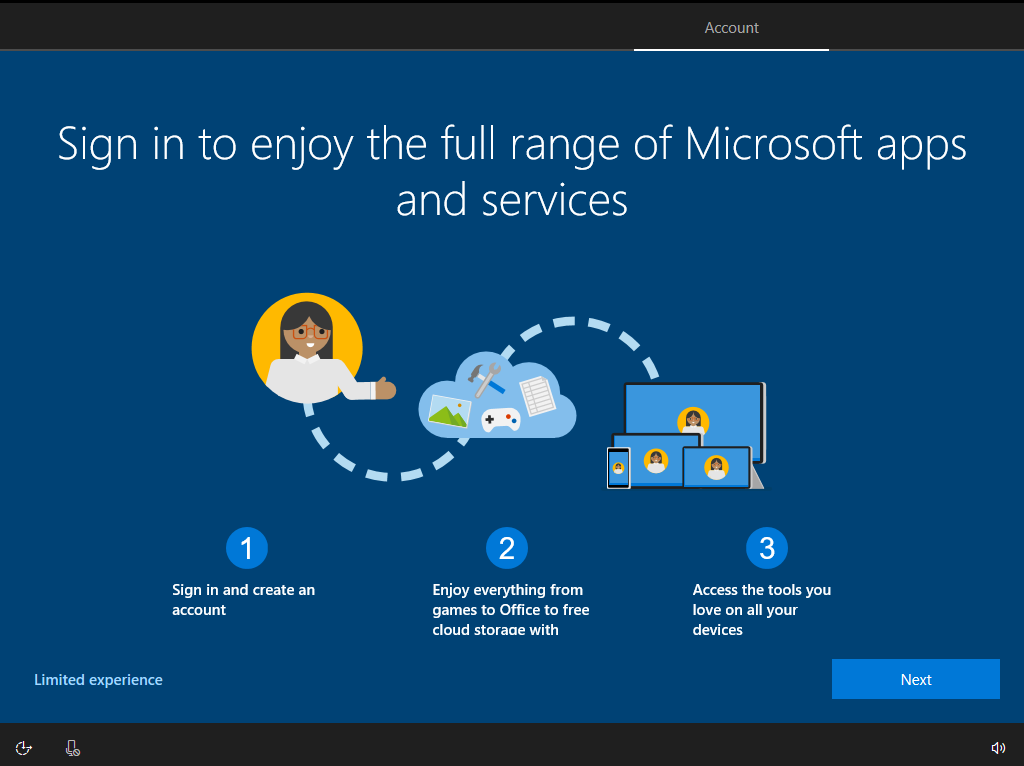
Select limited experience.
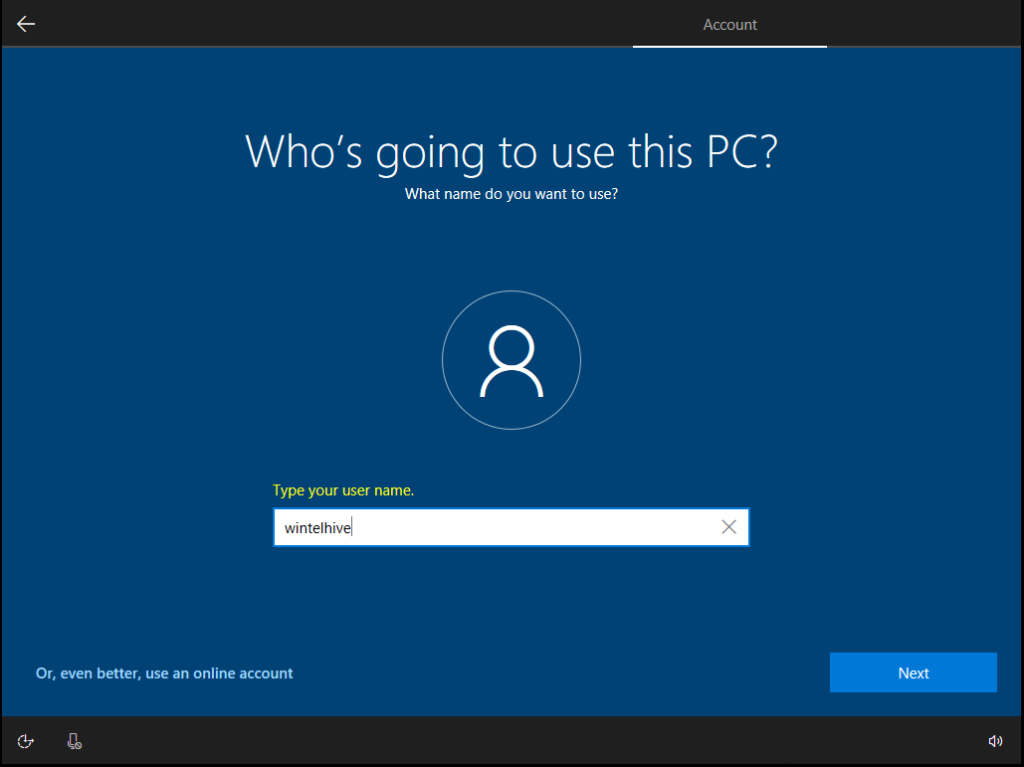
Type a username that you want to use permanently and click next.
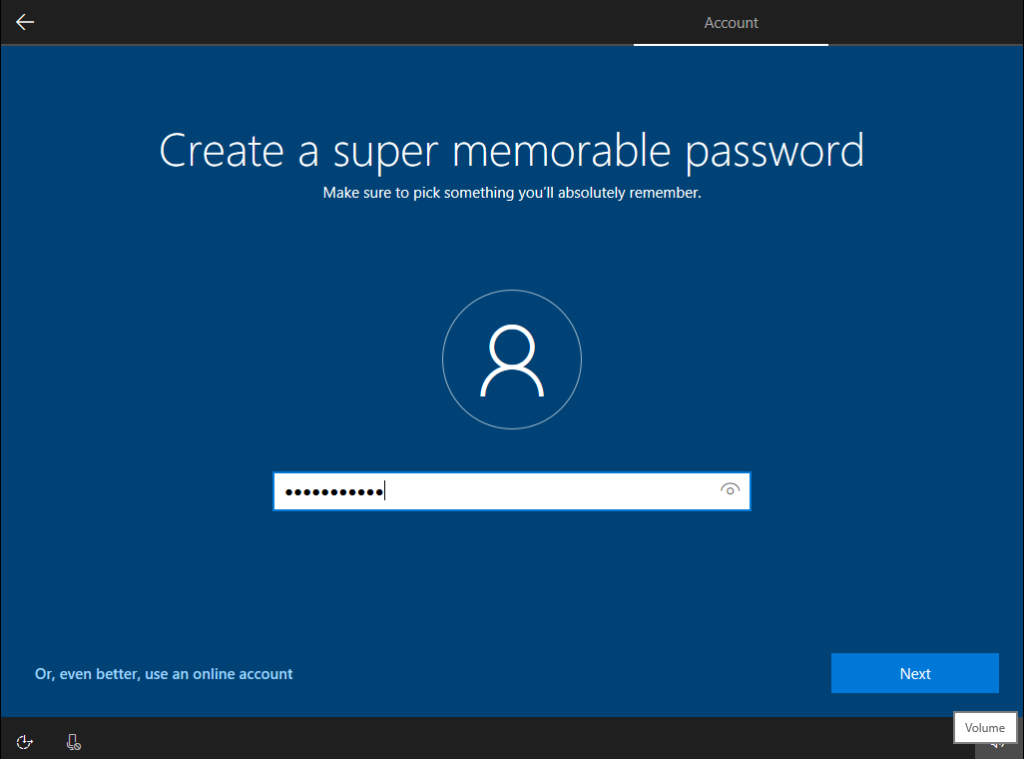
Here you need to select and type a password. Click next. (We suggest to use a complex password if possible)
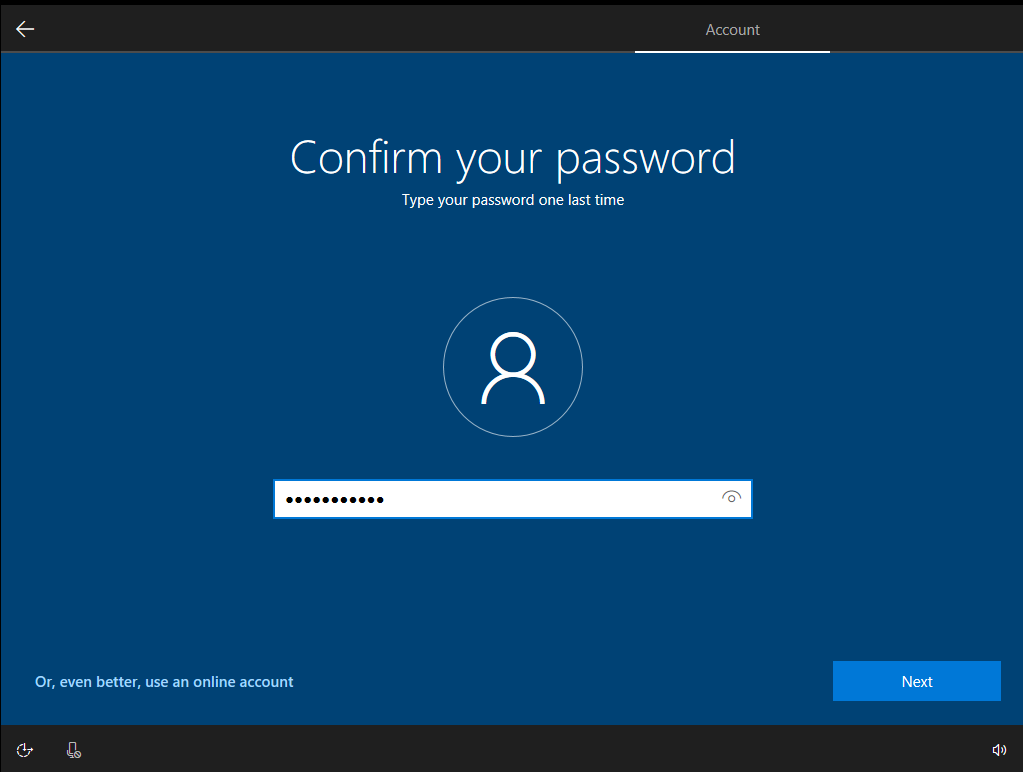
Confirm your password and click next.
Select a security question. Type its answer and click next.
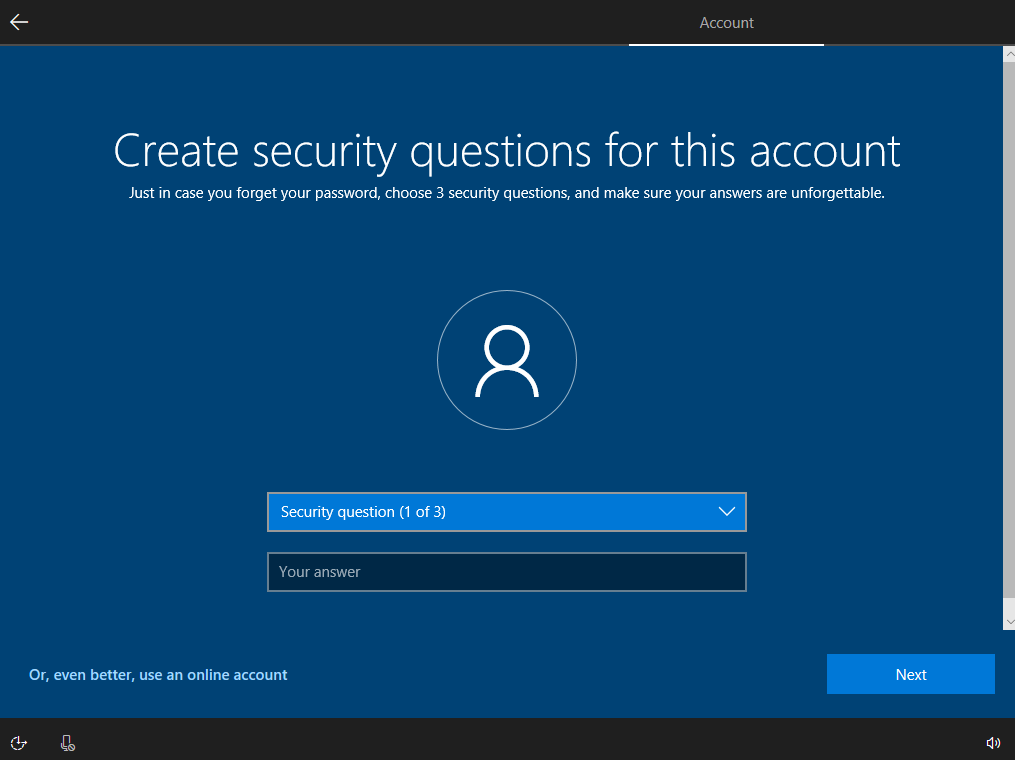
Repeat this for all three question.
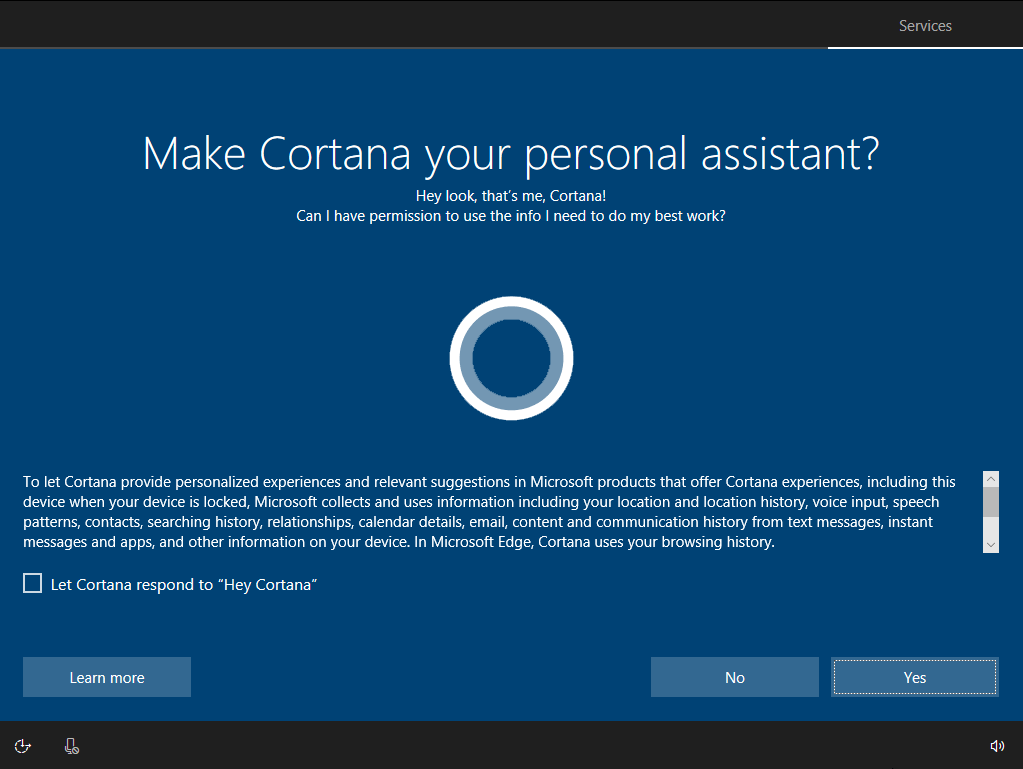
Make Cortana your personal assistant. Select Yes or No. (We will select no).
Select accept the privacy settings of your device.

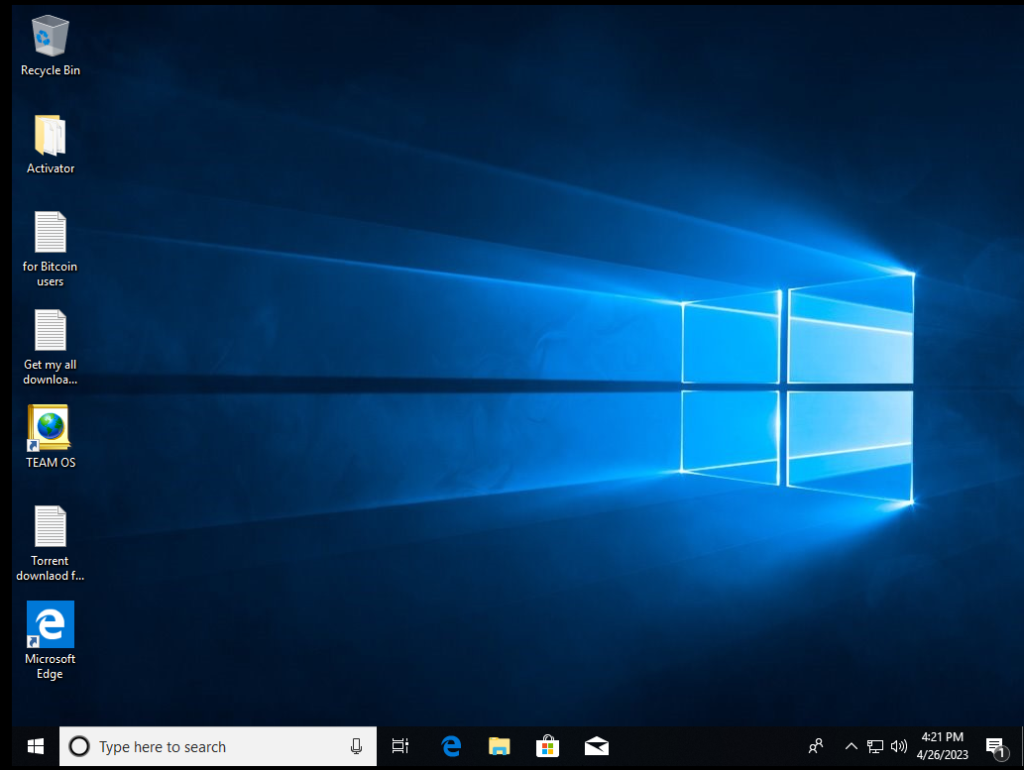
Wait for a couple of minutes and your Windows 10 is ready. You are good to go.
This is how you install Windows 10. Lastly if you are interested in understanding the installation process of Windows server. You can go through “how-to-install-windows-server“.


Leave a Reply